Sunday, November 11, 2012

Spicy Bean Burritos


These aren't your typical bean and cheese burritos. These have a kick.


Ingredients:
Vegetable oil
Garlic
Chili powder
1 Chile from a can in adobo sauce
Ground cumin
Cayenne pepper
Pinto or black beans
Brown rice (cooked)
Salsa
Tortillas (burrito sized)
Cheese
Lettuce
Green onion
Sour cream

One of these days I want to try cooking my own beans, rather than getting them from cans every time, and will probably start with this recipe, since it's so flavorful. It would be very easy to make spicy beans from scratch.


Chop a few cloves of garlic and one of the peppers from the can of chiles in adobo sauce and put them in a hot pan with a tablespoon of vegetable oil, a teaspoon of chili powder, a spoonful of adobo sauce, a teaspoon of cumin, and a few shakes of cayenne pepper. Depending on how hot you want it you can add more or less of those spices. Cook all that for about a minute to let it all simmer together.


Add the beans! If you're making a ton, use two cans (should feed 6 people). The recipe we used said to use a can of pinto and a can of black beans, but it was just the two of us so we used the one can, which gave us 3 medium sized burritos each. With all those spices it sure comes out hot. 


Add 1/3 cup of water with the beans and mix everything together real well. Make sure all the spices and adobo sauce covers the beans and bring it to a simmer over medium heat. Once it's a little bubbly lower the heat to medium low and mash the beans a little bit with a spoon. Continue cooking for 8-10 minutes, stirring and mashing as you go.

Ricey, beany, spicey.

Mix in about a cup of cooked brown rice and about a 1/4 cup of fresh salsa. Stir everything together real well so the rice is coated in the bean spices and the salsa. 

A little bundle of everything yummy. 

Assemble the burritos! We got a package of medium sized tortillas, and they really could have been bigger. Two of the medium sized equals one of the normal, large burrito sized tortillas, so we each had to have two to feel nice and fed. 

The trick to rolling a good burrito: don't overstuff it. Put what looks like a very small amount of the bean mixture in a line in the middle of the tortilla and add the toppings. After you put the cheese, onions, lettuce, sour cream and avocado on it (and maybe a dab of extra salsa) your burrito will be quite full. If you've ever been to Chipotle and watched them roll the burritos, try to copy that method. They take one side of the tortilla, fold it over quickly and use the tortilla to pull back all of the ingredients into a nice little package. Then, fold one end side inwards like you're wrapping a present and continue rolling the burrito over the end fold. If it's too stuffed it'll split down the middle, spilling bean goodness everywhere.
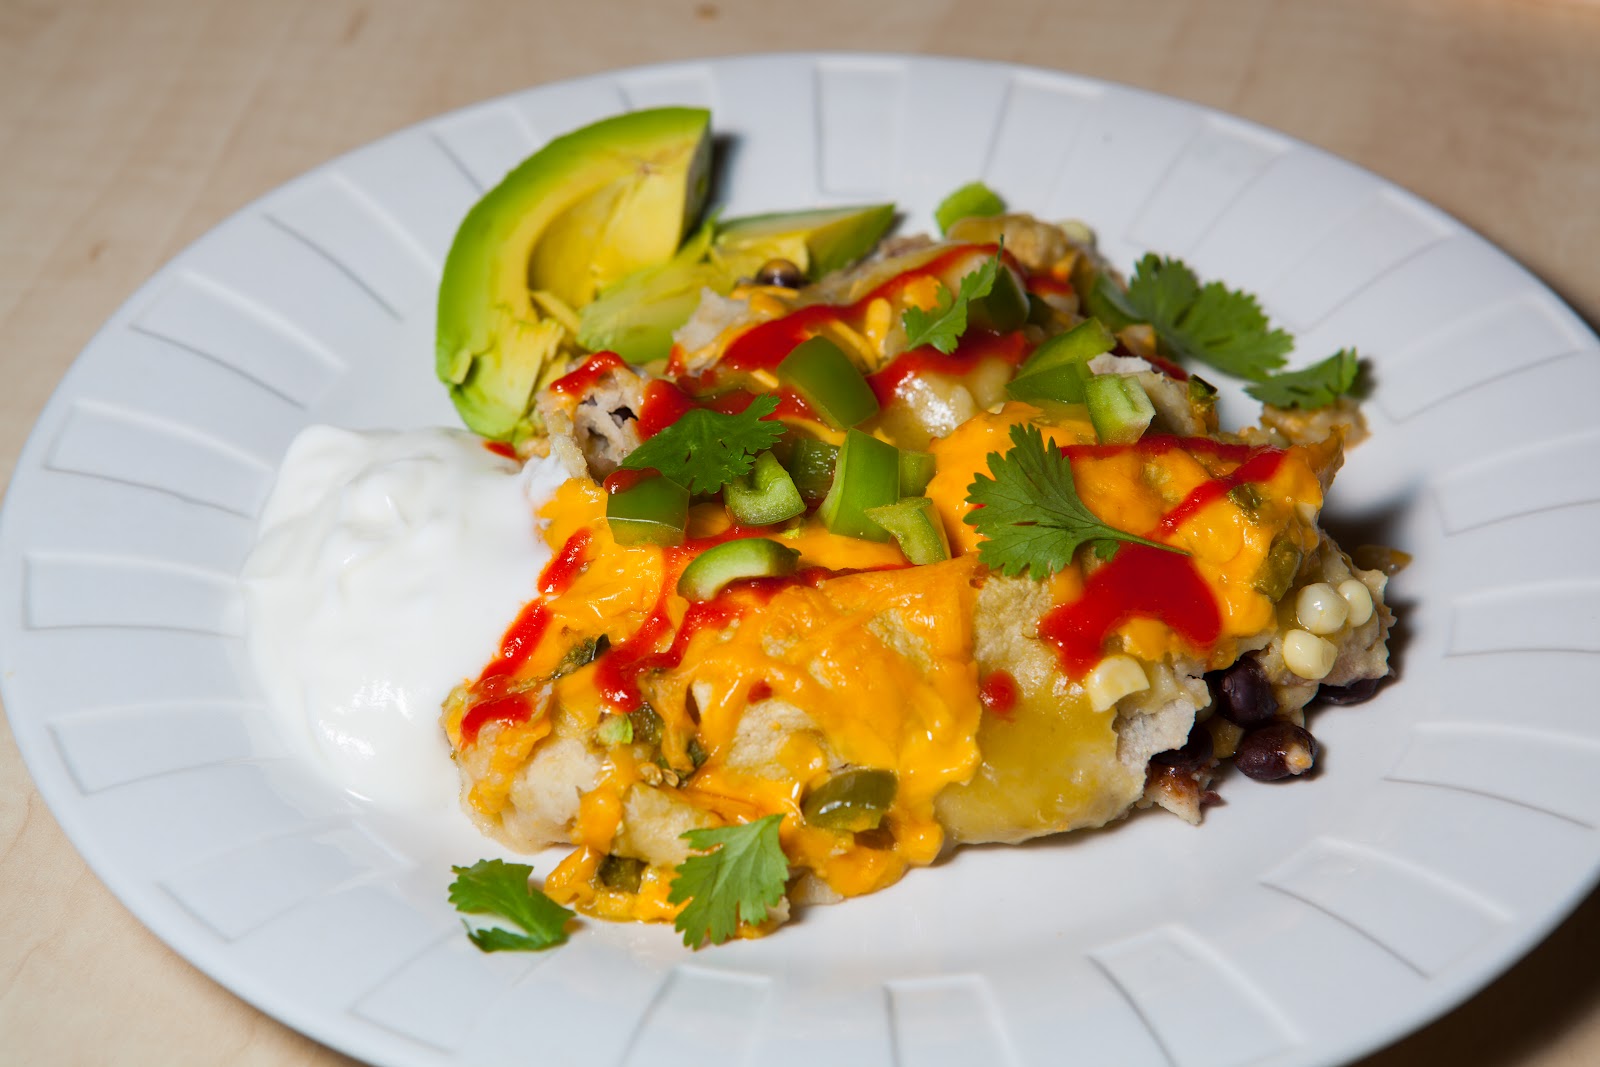
Add sriracha!

Total Cost: ~$15 (feeds 4-6, assuming you already have the spices... if not it's time to invest)
Total Time: ~30 minutes (including chopping, excluding time to cook rice)

Saturday, November 10, 2012

Sriracha Brussel Sprouts Over Quinoa


This recipe came about when I was craving avocado and happened to have some Brussels sprouts that really needed cooking. When I saw the sriracha I knew Rich would love it. And as weird as Brussels sprouts, quinoa and avocado covered in sriracha sauce sounds it's actually super delicious.


Ingredients:
Quinoa
Broth
Brussels sprouts (15-20)
Sriracha sauce
Avocado
Cheese
Garlic
Shallot
Olive oil
Lime
Salt and pepper


Cook quinoa like you cook rice, except use broth instead of water. (Exchanging broth for water when cooking rice makes it sooo tasty.) Use two cups of broth for every one cup of quinoa. Stir the quinoa real good because the grains will gather at the surface of the broth.

Like so.

Bring it to a rolling boil, then put the heat on low and cover. Cook for about 15 minutes or until the broth has been absorbed, and in the last minute or so squeeze in some lime juice. The recipe I used called for lime zest, which might actually make the lime stand out more, but I have no idea how to zest.


While the quinoa is cooking, get the sprouts ready. Chop a few cloves of garlic and a shallot and mix with 3 tablespoons of olive oil, salt and pepper, and a bit of lime juice. Douse the whole thing in 2 tablespoons of sriracha sauce and mix it all together really well. 


Clean and stem the Brussels sprouts, removing any loose outer leaves. Then douse the suckers in the garlicy, shalloty, srirachay mixture.


Line a baking sheet with tin foil and spread out the Brussels sprouts. Cover them with any of the sriracha mixture left in the bowl. If a little more olive oil is needed brush it over the tops.

Shiny, delicious sprouts.

Bake at 350 degrees for about 15 minutes and then turn. Cook again for another 15-20 minutes, adding a tad more olive oil if necessary. Don't make them drenched in oil, just don't let them dry out.


Once they're good and crisped, sprinkle a small bit of cheese over the tops of the sprouts and return to the oven for another minute or two.


Remove them from the oven, add a diced avocado, and spoon the whole thing over a pile of quinoa. Add as much sriracha as you wish- the lime and avocado counteracts the spiciness, so you can add a lot more than you can usually handle. Or at least that's how it was for me... certain others like to pile on the rooster sauce.


And eat! This is also fantastic as leftovers. Just add fresh avocado and more sriracha.

Total Cost: ~$10 (feeds 4 easily)
Total Time: 45 minutes

Sunday, September 23, 2012

Weed

No, not that weed. Though they do like the association.

Somewhere on there it says "enjoy legal weed"

Rich and I recently went on a 2,000+ mile road trip up to Oregon. It took us several days to get there because we stopped and saw the families and camped in between, but the trip back to San Diego took us one day. One brutal day of nothing but driving. 

One of the more interesting stops was in Weed, California. We paused to get gas, Rich took a picture of the Weed sign and we bought things that said weed on them. One was a shot glass for my friend as a thank you for housesitting, which said "I <3 Weed,"and the other was this bottle of beer. 

Welcome to Weed, CA

Disappointingly but not surprisingly enough, Weed beer wasn't all that great. For a $4 22oz it wasn't bad to share (with our delicious enchiladas), but I think we both had higher hopes for this beer.

Oh well, it was a novelty idea. 

Saturday, September 22, 2012

Black Bean Enchiladas Suizas

Enchilaaadaaaaaaas

Before Rich and I got together I made these enchiladas once or twice a month (or more) with my lady friend. They're fantastically delicious and easy enough to make a giant pan to have leftovers for a couple of days (or feed several people). I made them for the first birthday I spent with Rich and they were gobbled up. Fast forward to very recently when Rich asks why I haven't made the enchiladas since his birthday almost a year ago.

Ummm... 

Probably because we've been making these every week? 


Oh god... tomorrow is Nacho Night.

Anyway, now that the weather is potentially getting cooler I think these babies will have to make a comeback. I've also made a promise to not let it get that long in between enchilada nights (which, honestly, I'm kind of surprised at myself... I love these things!). 


Ingredients:
Tortillas
Cheese (pepper jack, but cheddar or Monterey Jack works)
Black beans
Corn
Large can of verde sauce
Toppings (jalapenos, hot sauce, black olives, bell peppers, tomatoes, cilantro, green onions, avocado, sour cream, whatevs)

Get enough ingredients to fill a 13x9" pan and you'll feed the whole house for two days. Seriously. It's a good idea to warm the tortillas so they're pliable and can be rolled without breaking in half. I use a tortilla warmer (my favorite kitchen tool) but a damp paper towel over a stack of tortillas in the microwave works, too.

The great beginnings.


Spoon black beans and corn into the middle of a tortilla and top with a small fingerfull of cheese (you can also put the jalapenos in the tortilla). Roll it up nice and tight and place it in the pan. You don't want the tortillas to be too full or they won't roll very well. Repeat this until you have a full pan of rolled tortillas.


Saucy!


Sometimes we end up with leftover ingredients and I'll spoon them over the top of the pan. Cover the whole pan with the verde sauce and sprinkle a good amount of cheese over the top. Get the corners so it comes out a little crunchy. Bake at 350 degrees for about 20-30 minutes or until the cheese is as bubbly as you like it or until the smell is too overpowering to wait any longer.

Cheese!


Once it's done, top with whatever toppings you like. I always have black olives, sour cream and hot sauce, but it goes so well with everything else, too. 

Ah. Maze. ING!

Nom.

Damn, I totally want enchiladas now. Here it is again, just because it's so delicious looking.

NOM

Total Cost: $11-$17 including toppings (feeds 4-8)
Total Time: 45 minutes

Monday, July 30, 2012

Growing Dinner

Store bought basil with cherry tomatoes, jalapeños, and bell peppers.


We posted a while ago about how we were attempting to grow herbs, tomatoes and peppers on Rich's balcony. Well, we started to fail at gardening. Turns out we were using the wrong kind of soil, which in potted balcony gardening is pretty crucial. We remedied that, buying nice Miracle Grow soil, and repotting.

They were much more red in real life. My cell phone camera sucks.

And BOOM! Growth. Except we gave up on the herbs... maybe in the fall we'll plant winter herbs.

JALAPEÑOS!

The tomato plant has been the most successful with the jalapeño pepper plant not far behind it (poor bell pepper plant had a rough childhood and hasn't flourished quite as well in its new environment). So we decided a harvest was in order!

They were still warm from the afternoon sun.

Over the weekend we made orzo with sun dried tomatoes and garnished the dish with the cherry tomatoes we grew! Hooray! If you have any possibility of growing your own tomatoes I cannot recommend it enough. Home grown tomatoes taste a million times better than any organic tomato you'll find in any grocery store. If you can't grow your own (I live in an apartment and I'm growing some, so really anyone can) try to buy some at a farmer's market. Good tomatoes are so worth it. I swear you can taste the sun.

Thursday, July 19, 2012

The Breezeway Burger

 It didn't survive long after this photo was taken...

So you may notice that this is meat. Anyone who knows Lindsay knows that Lindsay doesn't eat meat. That means today's post is brought to you by Mr. WSBF. So sit back, put on your burger bib and get ready to get a bit messy.

First ,you may ask yourself, "What the heck is a breezeway?" To answer that question I'd have to go all the way back to when I was 15. I was a sophomore in high school at St Joseph Notre Dame in beautiful (?) Alameda California. The Breezeway was a pretty straightforward place, it was a hallway/alley that led to the school's back entrance. There wasn't much to it, but with the right people there it became one of my favorite places.

This burger is so named for those same qualities. There really isn't a lot to it, but with the right mixture of ingredients and proper cooking it becomes a melt in your mouth exercise in deliciousness.

Mmm Fixins
Ingredients:
Ground beef (Though any ground meat should go well with the other flavors.)
Worcestershire sauce (Wurst-ter-sure)
Spicy mustard w/ horseradish 
Salt / Pepper
Goat Cheese Crumbles
Lettuce
Tomato
Avocado
Bun!

There's a lot more cheese in there than this shows.

Step 1: Take that handful of beef and put your goat cheese crumbles in it. I used a fair amount but you don't want to overdo it. The cheese isn't great at helping the burger hold its shape while cooking. That being said, don't skimp either or the other flavors will overpower it completely. It's a delicate balance so go with your gut on this one.


Step 2: Once you've got a healthy amount of cheese in there it's time to make your burger shape. I use my hands for this but I know some people that use rolling pins. I think to get that perfect burger shape you've really got to feel it on your palms. Check for weird pockets where there's too much cheese or the meat isn't holding together. Ball it back up and re-squish it if you must.


Step 3: Time to sauce it! You want a good dose of Worcestershire on there. Once you've seasoned it with a bit of salt and pepper stick it in the fridge for about 15-20 minutes. This gives the sauce time to really soak into the burger.


Step 4: Grab yourself a non stick pan (or grease a sticky one) and start cooking! Set your burner to medium (5 or 6 on a 1 to 10 dial) and let the pan heat up for a couple of minutes. When cooking any kind of meat a consistent temperature is important so you don't over/under cook it. You don't want the temperature changing much while it's cooking. I like to let it cook for 7-8 minutes. Cook on one side for a minute, then flip. Repeat the process until your burger is a deep brown and it's starting to leak juices from the top side. In the last 2 minutes or so I like to quick chop my toppings and toast the bun.


Ta da!


Step 5: Assemble and enjoy!

Total Cost ~ $8
Cook time with prep ~ 18 minutes.


Sunday, July 8, 2012

Cookies and Ice Cream

Mmmmmm.....

OK, so we didn't make this, per se, but we did assemble it and devour it so it counts, right? Trader Joe's makes the best packaged cookie dough I've ever had. Each package (around $3.50) comes with 16 pre-rounded chocolate chip cookie dough balls that you bake for a few minutes. They're warm and gooey and perfect. We decided to pair them one day with some chocolate chip ice cream. The combination does not disappoint. Try this. Feed your inner fat kid.

Saturday, July 7, 2012

Gnocchi with mozzarella, basil and tomatoes

It's like pasta but with potatoes.

This is one of the easiest, fastest and cheapest meals and it's hearty and satisfying. Gnocchi are little potato balls that work like pasta and are as versatile as pasta. You could literally put anything on them and it'll be great. I like to keep it somewhat simple because the gnocchi tastes really good by itself.


Ingredients:
Gnocchi
Grape tomatoes
Mozzarella
Basil
Olive oil, balsamic vinegar


Step 1: Boil the gnocchi. Takes about as long as pasta, like 10 minutes or so. When the gnocchi rises to the surface, boil for two more minutes.

 They have risen!

Take the two minutes to shred the cheese and prepare the basil. Drain the gnocchi and put everything together with a small bit of olive oil and an even smaller bit of balsamic vinegar. Fee free to sprinkle with salt and pepper if you want, but we didn't.


Enjoy! A very italian dinner with all the right colors. This can even be gluten free if you find gnocchi that isn't packaged with wheat flour (to keep the potato balls from sticking together). You can also make a mini caprese salad appetizer with the same ingredients.

Total cost: ~$7 (feeds 2-4)
Total cook time: 10 minutes

Thursday, May 31, 2012

Portobello and Eggplant Tacos

Please oh please click on the picture for a bigger shot. It's so pretty.

This truly genius idea came about when I asked Rich one night what he wanted for dinner and he said eggplant, and this eggplant jambalaya dish we make (that will make its way on here eventually...) just wasn't doing it for us. Rich introduced me to the vegetarian taco at Fred's Mexican Cafe here in Old Town and I've ordered it every time since then: portobello mushroom, eggplant, corn, avocado and cotija cheese. So. Frickin. Good. 

And then the lightbulb went off and we realized we can make them. OURSELVES! It was every bit as good as we imagined and then some, and they turned out even better than the ones in the restaurant (if we do say so ourselves). The only disappointment was preparing a whole cookie tray of veggies thinking it would be more than enough, and it so wasn't. We're fat kids... I should have known. But we had leftover raw veggies so this was also lunch the next day, and I have a feeling we'll be eating this again soon and frequently.


Ingredients:
Eggplant
Portobello mushrooms
Corn
Avocado
Mexican cheese (cotija, pepper jack)
Tortillas
Salsa
Seasonings (garlic, salt and pepper)

Chop the eggplant and mushrooms to thick bite sized pieces and spread on a cookie sheet with the corn.  Cover everything with a healthy coating of your seasonings, and flip or stir so the seasons get on all sides. Bake at 350 degrees for 10-15 minutes on each side, flipping once.


Once the veggies are done to your liking (the mushrooms get a little brown and juicy) warm your tortillas and spoon the mixture into them. Top with avocado, shredded cheese and a tiny spoonful of salsa. 


We had enough veggies prepared for each of us to have four tacos, but that still wasn't enough. These were so good. So good, in fact, that here's another photo just to showcase the delicious goodness that these tacos are. 


Are the skies opening up and angels singing? I realize this is tooting my own horn quite a bit but they really are fantastic; the ingredients work together perfectly. This would be even better with roasted corn from the cob. Next time!

Total cost: ~$10 (essentially feeds 4)
Total cook time: ~35 minutes