Showing posts with label rice. Show all posts

Sunday, November 11, 2012

Spicy Bean Burritos


These aren't your typical bean and cheese burritos. These have a kick.


Ingredients:
Vegetable oil
Garlic
Chili powder
1 Chile from a can in adobo sauce
Ground cumin
Cayenne pepper
Pinto or black beans
Brown rice (cooked)
Salsa
Tortillas (burrito sized)
Cheese
Lettuce
Green onion
Sour cream

One of these days I want to try cooking my own beans, rather than getting them from cans every time, and will probably start with this recipe, since it's so flavorful. It would be very easy to make spicy beans from scratch.


Chop a few cloves of garlic and one of the peppers from the can of chiles in adobo sauce and put them in a hot pan with a tablespoon of vegetable oil, a teaspoon of chili powder, a spoonful of adobo sauce, a teaspoon of cumin, and a few shakes of cayenne pepper. Depending on how hot you want it you can add more or less of those spices. Cook all that for about a minute to let it all simmer together.


Add the beans! If you're making a ton, use two cans (should feed 6 people). The recipe we used said to use a can of pinto and a can of black beans, but it was just the two of us so we used the one can, which gave us 3 medium sized burritos each. With all those spices it sure comes out hot. 


Add 1/3 cup of water with the beans and mix everything together real well. Make sure all the spices and adobo sauce covers the beans and bring it to a simmer over medium heat. Once it's a little bubbly lower the heat to medium low and mash the beans a little bit with a spoon. Continue cooking for 8-10 minutes, stirring and mashing as you go.

Ricey, beany, spicey.

Mix in about a cup of cooked brown rice and about a 1/4 cup of fresh salsa. Stir everything together real well so the rice is coated in the bean spices and the salsa. 

A little bundle of everything yummy. 

Assemble the burritos! We got a package of medium sized tortillas, and they really could have been bigger. Two of the medium sized equals one of the normal, large burrito sized tortillas, so we each had to have two to feel nice and fed. 

The trick to rolling a good burrito: don't overstuff it. Put what looks like a very small amount of the bean mixture in a line in the middle of the tortilla and add the toppings. After you put the cheese, onions, lettuce, sour cream and avocado on it (and maybe a dab of extra salsa) your burrito will be quite full. If you've ever been to Chipotle and watched them roll the burritos, try to copy that method. They take one side of the tortilla, fold it over quickly and use the tortilla to pull back all of the ingredients into a nice little package. Then, fold one end side inwards like you're wrapping a present and continue rolling the burrito over the end fold. If it's too stuffed it'll split down the middle, spilling bean goodness everywhere.

Add sriracha!

Total Cost: ~$15 (feeds 4-6, assuming you already have the spices... if not it's time to invest)
Total Time: ~30 minutes (including chopping, excluding time to cook rice)

Tuesday, May 29, 2012

Five Layer Dip


This should have been a six layer dip, but I forgot the salsa, and the bottom layer was, like, 7 layers in and of itself thanks to the joy that is leftovers. 


I seriously love leftovers. We know people who do not like leftovers, and to us they're just crazy. Sometimes the best part about a meal is the leftovers (hello, turkey sandwiches the day after Thanksgiving?), especially when that meal gets to marinate in itself overnight, becoming even more flavorful and delicious. 

The bottom layer of this bean dip is actually the rest of the stuffed bell peppers we made last week, which were bomb (go check out that recipe, it's amazing). Basically beans, rice, tomatoes, soyrizo and a ton of spices. And corn, I'm pretty sure there's corn in there.


This photo does a much better job of showcasing the layers:
Bean mixture
Sour cream
Cheese
Avocado
Cilantro (not pictured... it didn't occur to me until right before eating it to use cilantro)

Just goes to show that every bit can be used and reused. We threw this together in about 5 minutes; it would have taken 10 if I wasn't lazy and actually mashed the avocado into guac with some tomatoes, but it worked this way.

Sunday, May 27, 2012

Stuffed Bell Peppers


Even though stuffed bell peppers should be the easiest fancy dish ever, this took us a couple tries to get right. The first time I was going off of several different internet recipes that all said to use uncooked rice, so I also used uncooked rice despite thinking it wasn't going to work. I was right and it did not work. Rich still says the first try was great, except for the rice, but I couldn't get past the hundreds of hard little uncooked rice grains... so the second time around I cooked the rice first.


Ingredients:
Bell peppers
Tomatoes
Onion
Garlic
Soyrizo (or ground meat)
Cheese (pepper jack and Colby work really well)
Mushrooms
Rice
Worcestershire sauce
Cilantro
Corn
Green onions
Black beans
Canned tomatoes
Canned diced peppers
Seasonings
Whatever else sounds good, honestly


This is a prettier photo than boiling rice, even if the step is useless.

All of the other internet recipes said to boil the bell peppers for five minutes to get the skins softer and more prepared to be baked, but the second time around we skipped this step and it didn't make any difference whatsoever. I'd say skip this step for the sake of time and all that water. Instead, use that water to boil your rice!


Cook the soyrizo! Seriously, soyrizo is the best meat-ish thing to put in a stuffed bell pepper. It has such a great flavor on its own that it imparts to the dish as a whole that ground beef or even ground turkey just won't be able to match. Go generous with the soyrizo because there's plenty of other ingredients that'll try to steal its thunder.


Add the diced onion (like, half the onion), chopped garlic, and for funzies some chopped bell pepper. I'm pretty sure there's some diced eggplant in this photo too... these two tries taught us that it really doesn't matter what you stuff inside a bell pepper as long as it tastes good to you.


 This mix is good all on its own.

Add the canned tomatoes, diced tomatoes, canned diced peppers (or diced jalapenos), black beans, corn, cilantro, green onions, Worcestershire sauce (about a table spoon), whatever seasonings you like, and mushrooms, if you like them cooked. I prefer fresh mushrooms so they were more garnish than ingredient.


Hollowed peppers

Cut out and clean the bell peppers. You can do them two ways: like a bucket, above, or like boats, below. The first time we used buckets because the peppers were small and were able to stand up on their own (you could also cut portions off the bottom to help them stand upright), but the second time we did it boat style because they were much bigger and more weirdly shaped. I like boat style best because it's easier to eat.

Boats!

Spoon the delicious goodness that you've prepared (remember to mix the rice in) into your bell peppers. Fill those guys up to the brim and get the mix into the little crannies that bell peppers have. If you're doing them bucket style pack it in 'till it's almost overflowing. We also mixed some shredded cheese into the mix before stuffing the bell peppers to make it creamier.

Cheesey bell peppers

Top with cheese! The blend of Colby/Cheddar with pepper jack cheese is really pretty and it melts perfectly and the tastes complement each other. The meltyness helps keep the goods in the pepper.

Buckets!

Here are cheesy stuffed bell peppers boat style. These stood up in an 8x8 baking dish. (Because we're fatties, we each ate two... but when properly prepared and with rice they can be a meal on their own.)

That one has a chipotle cheese that I wanted to try. Yum.

Line the dish with foil (though I'm not sure what that does) and set up the bell peppers so that they won't move around. We fit 6 large halves together in a 13x9 baking dish. Cover the whole thing with foil and bake at 350 degrees for 30 minutes. Check on them and if they look like they need a bit longer keep them in the oven another 10 minutes.


Maybe top with some mushrooms, or cilantro, or green onion and DIG IN. This is a super hearty meal that's surprisingly healthy and pretty impressive if you're going to serve a group (you could make a big pot of the mix ahead of time and bake the peppers right before guests arrive). Yum!

Thursday, March 8, 2012

Green Curry with Tofu


It took forever, it seems, but I finally got the hang of cooking tofu. The first few times I experimented with it the tofu came out soggy and completely unlike the deliciousness that Thai restaurants always serve up. But because it's a dollar a package and a good source of healthy protein I was determined to make it work.

And work it did. Turns out the key, at least for curry, is frying the tofu, which, admittedly, doesn't do much for its health benefits. But this blog is "we should be fat," not "we should be healthy role models."

Ingredients:
Rice
Tofu
Coconut milk (1 can)
Curry paste
Chicken or vegetable stock
Bamboo shoots
Bell pepper
Peas (or green beans)
Basil
Olive oil
Seasonings

Cheapest form of protein out there.

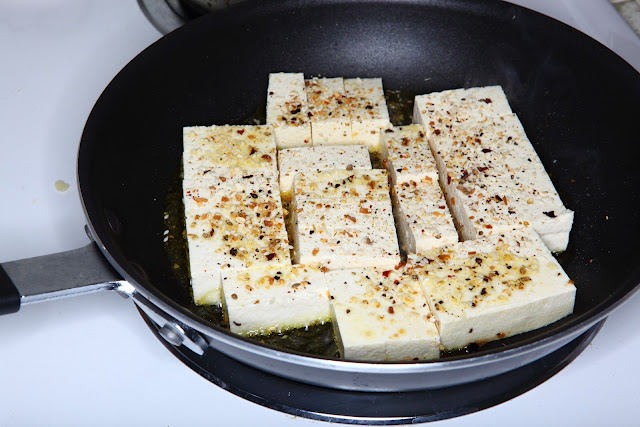
Cube and dry the tofu. Use a clean cloth or paper towl to soak up the extra juice that the tofu is packaged in. Put the tofu in a large pan on medium-high heat with just enough olive oil to cover the bottom of the pan and sprinkle the tops of the pieces with whatever seasonings you like. Here, we used a mix from Trader Joe's called Everyday Seasoning and sesame seeds. While that's cooking, make your pot of rice. Both brown rice and white rice work wonderfully, and I've just discovered this delicious short grain white rice that I'm going to use for sushi (stay tuned for that for sure) because it's nice and sticky, so that's what we went with this time.


Golden soy squares!

Once the tofu has a nice layer of golden brown on the bottom, flip each piece to let the other side fry. The seasonings you put on the top will now get seared into the tofu for extra flavor. Just the edges are going to be browned, leaving the middle parts white so it's still soft. Don't burn your tofu.


The tofu is soaking in the curry flavors.

After both sides have a nice crispy layer, lower the heat to medium and pour in the can of coconut milk, stock, and a generous tablespoon of curry paste. I also throw in some dried basil and red pepper flakes for an extra kick because the curry paste is pretty mild. And the "stock" was just a chicken stock cube tossed into the hot pan of coconut milk. I didn't bother with making it into actual stock, but that just ups the flavor. And my laziness is rewarded.

Curry really complements green bell peppers. The other colors just aren't quite as good.

Chop your vegetables. Cut the bell pepper into bite sized bits and chop up your bamboo shoots and green beans or whatever else you're using. Peas work best, but the frozen bags at Sprouts were twice as expensive for some reason, so we used green beans. Frozen veggies work really well in things like curry and sauce, but nothing beats fresh bell pepper. And frozen bell peppers always end up soggy.

Almost ready!

Put the veggies into the pan after everything else has cooked about 10 minutes or so. Keep it at medium or low heat and put in frozen veggies before the fresh ones. I prefer my bell pepper to be a little on the firm side so I only cook them about 5 minutes. This is also the point you add fresh basil if you have it. Which we didn't.

You can see the pepper and basil flakes!

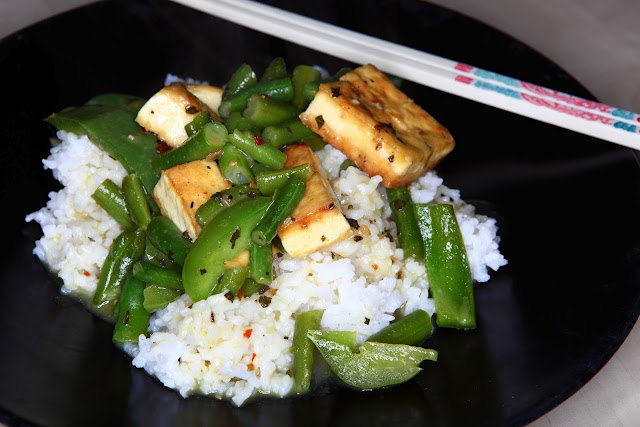
Scoop the mix onto rice and be sure to get a good amount of the sauce. This dish is the most complicated to make so far but it's worth it. Took me three tries to get it right. Because we're fat kids, it fed us both generously for dinner and there was enough left for normal person seconds. I had my leftovers for lunch the next day and holy crap was it good. Letting it sit overnight allowed the curry to soak into everything for maximum flavor. Also, this dish cost less than $5 to make and there's still leftover rice and frozen veggies for next time.