Showing posts with label jalapeno. Show all posts

Saturday, March 9, 2013

Egg and Spinach Casserole


Not gonna lie, totally saw this on Pinterest and just had to try it. I'm not one of those people who can skip breakfast and when I get hungry it's all I can think about (apologies to the boyfriend for putting up with me when I'm cranky and hungry).

That being said, this egg casserole is fantastic.

I went a little overboard with the garlic...

Ingredients:
Spinach (take what you think you need and double it)
Eggs
Cheese
Spices
Anything else you want!


Sauté the spinach (clean it first... and remove any stems). I pour a tad of olive oil into the pan and sprinkle salt and pepper over the leaves. Spinach wilts down to a tiny fraction of what it is fresh, so you should really pile it on. This photo shows a pittance of the amount of spinach you should use, even for a small 8x8 inch pan, but I forgot to take the photo when it was all piled on. This amount was just the leftovers of the spinach I already had (after piling it high in the pan) because there wasn't enough.

Ignore my awful tile. Lime green splatters? Really?

The really great thing about this casserole (well... any casserole) is that you can put anything you want in it. I had a jalapeño that was about to get all wrinkled so I chopped it up. Onions are great additions, as are chives and green onions. Mmmmm....

While the spinach is wilting (and make sure to turn it so each leaf gets properly wilted and no one leaf is over wilted), chop up whatever else you plan to use. Then scramble your eggs. The idea is to have just as much egg to cover the other ingredients; for an 8x8 inch pan I used 6 large eggs.


Put the sautéed spinach at the bottom of the pan (the original Pinterest recipe says to spray the pan with oil, but I've made this a few times and never have and it's been fine), then sprinkle a thick layer of cheese (again, a good opportunity to use what you have on hand - I had some leftover mozzarella and pepper jack), and top with the other ingredients.


Slowly pour the eggs over the other ingredients and use a fork to gently ease the egg into the layers. Then I sprinkled just a little bit more cheese over the top, pushed it into the egg, and generously peppered the top.


Cook at 350 degrees for 30 minutes or until it's as brown and bubbly as you like it. I didn't hear the timer go off on this one so it's slightly more brown than normal, but it was not burnt at all and tasted fantastic.


See? Look how beautiful and fluffy that is. 

Then I topped it with sour cream, Tapatio, and homemade salsa. And went back for seconds. And would have gone back for thirds if I wasn't going to be eating again soon...


You can make a big pan of these and save them in the fridge for one of the quickest and healthiest breakfasts that will keep you full until lunchtime, as long as you eat lunch at a normal hour and don't try to hold off until 2pm like some people do.

Total Time: 45 minutes
Total Cost: $5 plus the cost of whatever else you add

Note: In this particular post the photos are courtesy of my phone, which, while awesome and pretty decent at playing camera, is no match for Rich's actual camera. So if the pics look like cell phone pics, it's 'cause they are.

Saturday, February 9, 2013

Vegetarian Pho with Fried Tofu

 Hot, spicy pho

We discovered a love for tofu at this strange little bar right by my place that served pizza, tots, Vietnamese sandwiches, and pho. And beer. What an unusual combination, right? And they had things like breakfast pizza which sounded gross (egg on pizza?) but smelled so good. I ordered the pho with tofu one of the first times I went there on a whim and because I'd never had it before and I was hooked. I never ordered anything else at that place.

Eventually, they started running out of pho. I would be impossibly disappointed after getting my heart set on a nice big bowl of hot pho and learn they didn't have any. The bar went through a lot of changes in a few months, and we finally learned it was closing to allow the owner to move on to bigger and better things (you can read about that here). But I never stopped loving the pho.

So I figured... why not make it?


Turns out, however, the ingredient list for authentic pho is way long. To get the broth right you have to simmer a beef bone for hours and add all these spices I don't have. So I gave up and resolved to find another pho spot that wasn't 15 miles away. Then Rich got sick. It started with just a tickle in the throat one night, a very chilly night. Pho was sounding really good, and I'd just discovered pre-packaged pho base at Sprouts. So I figured why not, let's give it a whirl. And it turned out pretty darn good, especially for a first try. My only recommendation is to either get a meat base, add your own spices to a vegetarian broth, or load up on the sriracha. The vegetarian base by itself is a little... lacking.

The steps are actually ridiculously easy, as long as you have a good soup base.


Ingredients:
Pho starter base (veggie, beef, or chicken)
Tofu (and olive oil or butter for frying, plus any seasonings)
Rice noodles
Cilantro
Green onions
Bean sprouts
Basil
Jalapeno
Lime
Sriracha
Plum sauce (optional)

So. Yummy.

Chop your veggies. Slice jalapeno and lime, chop some green onions, and pick fresh basil leaves and grab a big handful of sprouts. 


Fry the tofu. I always use olive oil, but I know butter tastes better. Use whatever you like. Or just boil it and don't fry it at all, or do a dry fry with no oil or butter (just keep an eye on it). I like to put a bunch of seasonings on my tofu: chili peppers, black pepper, some garlic salt, and a good amount of sesame seeds.


Cook the rice noodles! Follow whatever the package says, but it's just like cooking any other noodle. Also, simmer the broth in a big pot until nice and hot. You might also want to add the tofu into the broth so it can soak up the flavor (and stay warm), and add in a few more spices if you go the veggie route.


Scoop some rice noodles into a big ol' soup bowl. I did not have the kind of bowls you get at pho restaurants, and I plan on remedying this soon. Add the green onions and cilantro.


Pour the broth and the tofu over the noodles. Let it steep in. Top with the rest of the ingredients!


Shrimp pho is also really good. And I'm sure the beef and other cow parts are delicious as well. But I really dig the tofu.

Total Cost: ~$15 (less if you already have some of the toppings)
Total Time: ~30 minutes (assuming you don't spend 12 hours simmering a beef bone)

Note: In this particular post the photos are partially courtesy of my phone, which, while awesome and pretty decent at playing camera, is no match for Rich's actual camera. So if some of the pics look like cell phone pics, it's 'cause they are.

Saturday, September 22, 2012

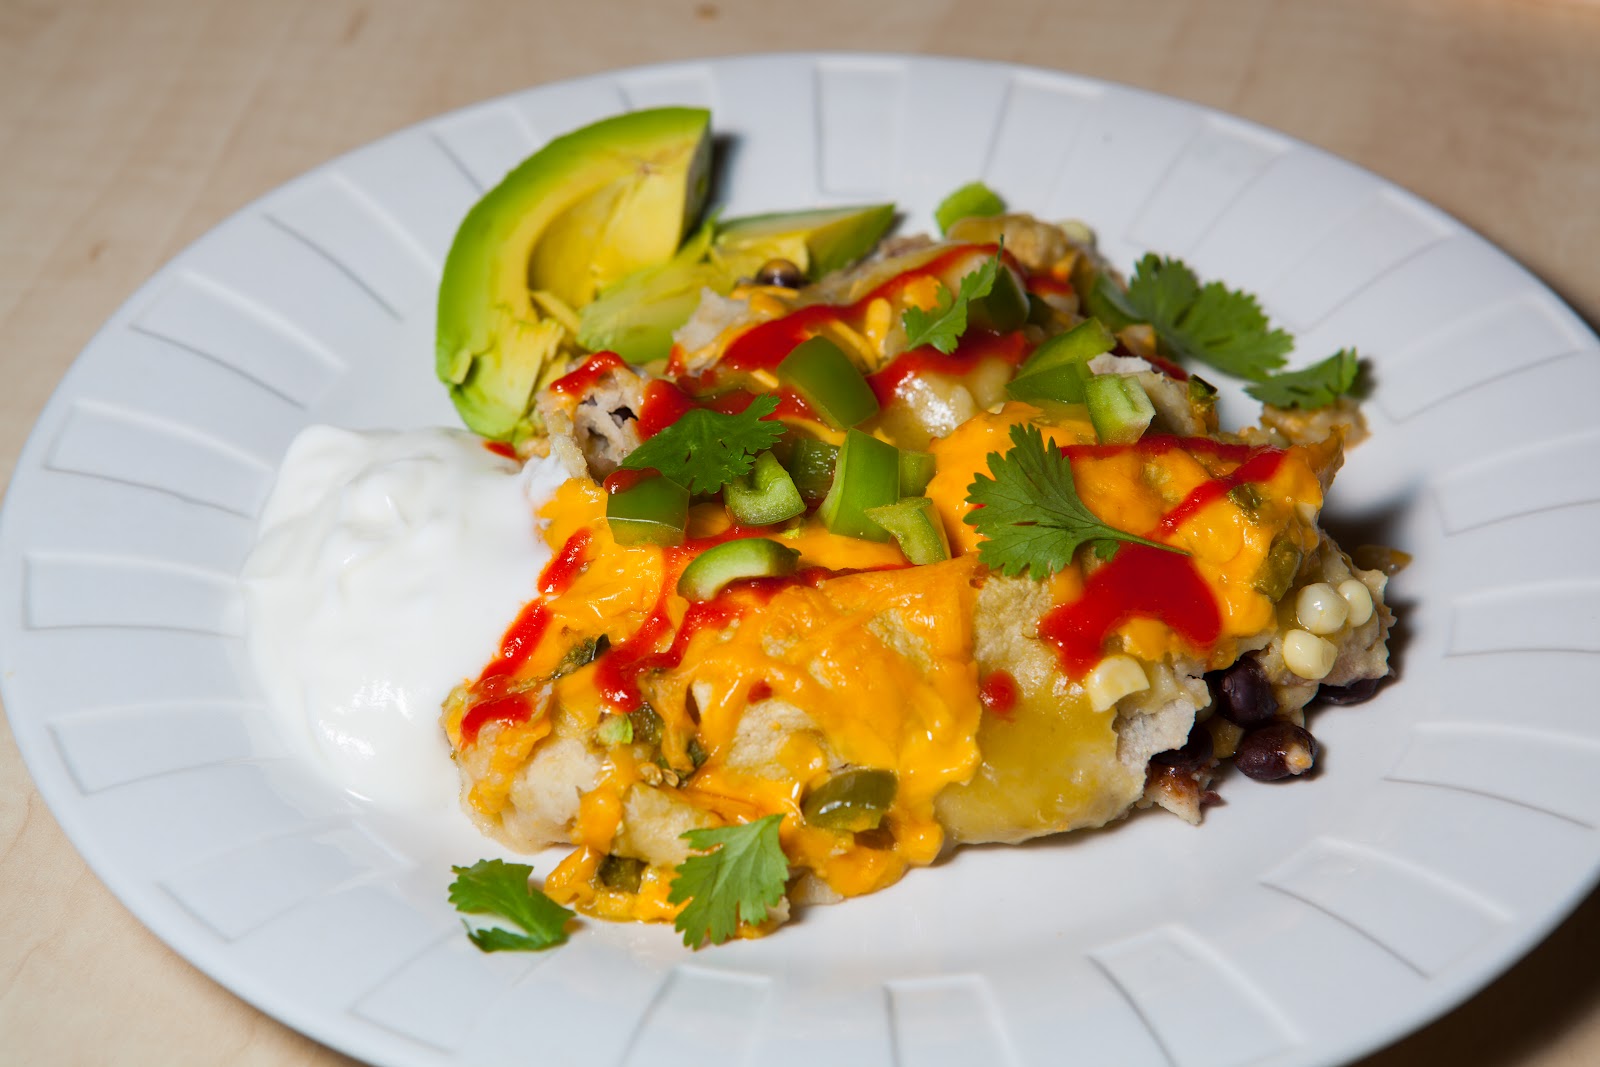
Black Bean Enchiladas Suizas

Enchilaaadaaaaaaas

Before Rich and I got together I made these enchiladas once or twice a month (or more) with my lady friend. They're fantastically delicious and easy enough to make a giant pan to have leftovers for a couple of days (or feed several people). I made them for the first birthday I spent with Rich and they were gobbled up. Fast forward to very recently when Rich asks why I haven't made the enchiladas since his birthday almost a year ago.

Ummm... 

Probably because we've been making these every week? 


Oh god... tomorrow is Nacho Night.

Anyway, now that the weather is potentially getting cooler I think these babies will have to make a comeback. I've also made a promise to not let it get that long in between enchilada nights (which, honestly, I'm kind of surprised at myself... I love these things!). 


Ingredients:
Tortillas
Cheese (pepper jack, but cheddar or Monterey Jack works)
Black beans
Corn
Large can of verde sauce
Toppings (jalapenos, hot sauce, black olives, bell peppers, tomatoes, cilantro, green onions, avocado, sour cream, whatevs)

Get enough ingredients to fill a 13x9" pan and you'll feed the whole house for two days. Seriously. It's a good idea to warm the tortillas so they're pliable and can be rolled without breaking in half. I use a tortilla warmer (my favorite kitchen tool) but a damp paper towel over a stack of tortillas in the microwave works, too.

The great beginnings.


Spoon black beans and corn into the middle of a tortilla and top with a small fingerfull of cheese (you can also put the jalapenos in the tortilla). Roll it up nice and tight and place it in the pan. You don't want the tortillas to be too full or they won't roll very well. Repeat this until you have a full pan of rolled tortillas.


Saucy!


Sometimes we end up with leftover ingredients and I'll spoon them over the top of the pan. Cover the whole pan with the verde sauce and sprinkle a good amount of cheese over the top. Get the corners so it comes out a little crunchy. Bake at 350 degrees for about 20-30 minutes or until the cheese is as bubbly as you like it or until the smell is too overpowering to wait any longer.

Cheese!


Once it's done, top with whatever toppings you like. I always have black olives, sour cream and hot sauce, but it goes so well with everything else, too. 

Ah. Maze. ING!

Nom.

Damn, I totally want enchiladas now. Here it is again, just because it's so delicious looking.

NOM

Total Cost: $11-$17 including toppings (feeds 4-8)
Total Time: 45 minutes

Monday, July 30, 2012

Growing Dinner

Store bought basil with cherry tomatoes, jalapeños, and bell peppers.


We posted a while ago about how we were attempting to grow herbs, tomatoes and peppers on Rich's balcony. Well, we started to fail at gardening. Turns out we were using the wrong kind of soil, which in potted balcony gardening is pretty crucial. We remedied that, buying nice Miracle Grow soil, and repotting.

They were much more red in real life. My cell phone camera sucks.

And BOOM! Growth. Except we gave up on the herbs... maybe in the fall we'll plant winter herbs.

JALAPEÑOS!

The tomato plant has been the most successful with the jalapeño pepper plant not far behind it (poor bell pepper plant had a rough childhood and hasn't flourished quite as well in its new environment). So we decided a harvest was in order!

They were still warm from the afternoon sun.

Over the weekend we made orzo with sun dried tomatoes and garnished the dish with the cherry tomatoes we grew! Hooray! If you have any possibility of growing your own tomatoes I cannot recommend it enough. Home grown tomatoes taste a million times better than any organic tomato you'll find in any grocery store. If you can't grow your own (I live in an apartment and I'm growing some, so really anyone can) try to buy some at a farmer's market. Good tomatoes are so worth it. I swear you can taste the sun.

Tuesday, April 3, 2012

Growing Our Own Food


We planted a garden!


From left to right: Jalapeno, Cherry tomato and orange bell pepper.


And an herb box! Cilantro, green onions and basil. Sooo can't wait 'till harvest time! Be prepared for fantastic food posts with our home grown food. So glad Rich has a balcony for growing things: my apartment is the only one in my building with no balcony/patio, so my tomato and pepper pots just hang out in the open... And speaking of my apartment, the pepper plant is starting to sprout leaves for its second season (yay!) and I bought a yellow tomato plant to give the tomato pot a second go. Hello summer!